Wednesday, August 29, 2012

Metacognition

Thinking about our thinking!

We will be attempting to discuss metacognition in reading next week.  I use the lessons from Comprehension Connections by Tanny McGregor.  They are awesome! I pretty much teach every single lesson that is in that book...so you will probably be reading about this book again this year. It's AMAZING!
If you don't have it...you need to get it!


I start with the "Reading Salad" lesson that is in the Comprehension Connections book. The lesson gives the students a visual  of how we should be reading....we should be doing A LOT of thinking.


As we practice thinking about our thinking together,we will be practicing and adding our metacognition song to our reader's notebooks.  Hopefully  this will be a great reminder for them to look at later.


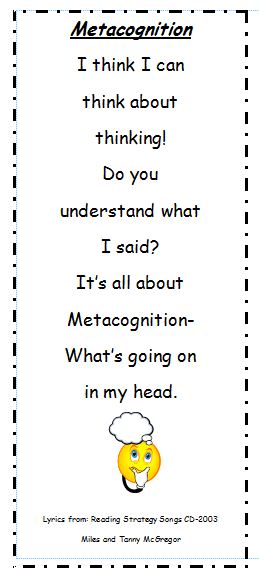
We will create a metacognition anchor chart like this one (found on Pinterest):

 
Pinned Image
 
The students will get their own small anchor chart like this to add to their reader's notebooks.


One of my favorite lessons for teaching metacognition is the thought bubble!  We have a great time with this!  The kids love to do this and it is great to add to a station for them to practice.
 
(Here's an example of the thought bubble in action.) 


The students will also help me create an anchor chart listing some thinking stems to help us start our thinking.  Here's a small example that we will add to our reader's notebooks.


I can't wait to get started with these lessons using the great ideas from Tanny's book!  (Seriously...you need to get this book! :)
 

Wednesday, August 22, 2012

Monster Bookmarks!

I saw these super cute bookmarks on Pinterest this summer and wanted to make my own!  I had my 8 year old and 6 year old make a few as examples. It was easy! (even though I had to redirect my 6 year old a few times when he thought it looked like a  bird and his paper was flying through the air, or when it started to look like a monster and he made it jump around and growl.  Boys.)  Anyway...they loved it!  I can't wait to try this out in my class.  It would be great to add to their bookbags!


I made the bookmarks by just folding, but there is also a template you can use instead.  Here's how we folded:


We used a square piece of paper 6 inches x 6 inches.  You can use any size.


Fold it into a triangle.


Fold the points to the top.


Then you open it up again and fold down the top point.

Last, you fold up the points and tuck them in.


You are done!  You can decorate it any way you like!


So cute and fun!  Love these!


If you would rather use the template-here's the link!

Tuesday, August 14, 2012

FORMTASTIC!

I like to make and use forms...there it is. I was recently called "formtastic."   Some of my teacher friends like to make fun of me and all my forms...right after they ask me for a copy of them. :)  I was reminded of this by a couple of my teacher friends recently, so that is the inspiration for this post.
I am just adding a few of the forms I use at the beginning of the year to TRY to stay organized.

Each student takes home a daily behavior chart that the parents have to initial. I just add it to their homework folder.  This is a new chart that I want to try out this year.  We'll see how it goes!


When there is a behavior problem, I like to use a quick FORM (I know that is suprising!) to send in their folder for a parent signature.  This is great documentation! I always keep a few copies in my room.


Meet the teacher is always stressful.  You are still trying to prepare your room/lessons for the first day and you have a bunch of students and parents coming in to meet you and drop off  all their supplies!  I am usually too stressed to ask the important questions that I need to know.  On the first day of school, I just want to make sure the students all get home the right way, safely.  I leave this paper out for the parents to complete at meet the teacher.


I also like to keep a spreadsheet of all the important student information in one place.  I created this document to do that, but it's a lot of work to put all that information in there.  My husband, Paul (I like to call him super nerd) told me to just create a Google form and have the parents go to my classroom blog to get the link to fill it out. I don't know why I haven't done that in the past!  I'm so going to do that this year!  If you don't want to do the google form, here's the link for the old school spreadsheet. ;)


Sometimes at the beginning of the year, we have a lot of students who have a hard time remembering their lunch number. (especially the really little people!)  It really slows down the lunch line. I like to send this note home with their lunch number to practice with their parents.  It really helps!


This next form is one that I am asked to share a lot.  I have a classroom blog where I post pictures, activities and projects that we do in class.  The kids and parents LOVE it!  It is a great way to show parents what we are doing.  It also motivates the students to get more involved  in what we are doing in class.  Before I post anything on that blog, I always send home this note as a courtesy to parents. 


Here's a link to my classroom blog if you are interested in following what we are doing in class!


I hope that you find some of these forms useful this year.  I'm sure I will have more "formtastic"  forms to post throughout the year!

If you would like to view or use any other forms, I made A WHOLE PAGE dedicated to forms!!  So exciting....for me anyway!  Click the Formtastic Forms page above to view more forms.


Tuesday, August 7, 2012

Writer's Notebooks

This year I plan to do a better job with my writer's notebooks.  I am really motivated right now because I just went to a great training on expository writing and writer's notebooks!  I can't wait to get this going in my class! 

Here is how I am setting it up this year:

In the front of the writer's notebook will be a table of contents.  This is where we will add our strategies and mini-lessons so the students will be able to find them in their notebooks easily.  In the back of their notebooks we will add a table of contents just for the mini-lessons on revising and editing.  We will add our strategies and examples for editing and revising beginning in the back of the notebook.  Here are the table of contents I plan to use.

Click here to get the editing/revising table of contents: Writer's Notebook Table of Contents 2


I am also going to add a few things to the beginning of my notebooks that worked well for me last year.  My students that really struggled with writing, frequently used the "I can write about..." page.  (Also great for my ESL students!)  I saw them turn to this page A LOT during writing workshop!


For the students that have trouble with sight words, we used this page.  Every week we added our new word wall words to the chart for them to refer to.


I also have a color word chart that can be added.  The students colored in the square next to the color word. This may be best for K-1 students, but my ESL students also referred to this chart often.


Getting the students to come up with ideas for their small moments stories can be a struggle, so I made some idea boxes for them to cut out and add to their notebooks.  They can refer back to it when they are ready to start a new piece and check off the ideas they have already used.


  We often talk about text to self connections during other lessons throughout the day and that leads to ideas that we could write a small moment about.  I created this page so the students could write their ideas down before they forget about them!


As I teach the mini-lessons, I always make an anchor chart and continue to add to it.  I wanted the students to be able to always refer back to the anchor chart.  I know I'm supposed to keep them all up...but I sometimes run out of wall space!  I started making little notes that have some of the information from the achor charts so the students could add them to their notebooks.  Here are a few that I have done:


I have one more thing to share....this doesn't go in the writer's notebook, but is a good tool to use during writing workshop!  I made this last year and it worked well for me.  When I conference with the students I take notes on the skills they have mastered and what they still need to work on.  Then, I go back and look at my notes to see what we ALL need to work on and what only a few students need to work on.  I can then plan another mini-lesson on the topic that everyone is struggling with, or plan a small group lesson for the few students that need help. 


I hope to post more about my writer's notebooks throughout the year...so check back!

I hope you found something useful here!


Wednesday, August 1, 2012

Daily 5

I am new to The Daily 5, but very excited to get started with it. I read the book and did a lot of research online about it.  So many teachers that use it have shared their ideas and resources online.

Here are a few great sites that helped me get ready for the Daily 5:


(lots of great downloads on this site!)


I did create a few things that I am hoping will help as I start the Daily 5.  I created a teacher checklist that could be used to keep track of where each student is going during the Daily 5.  This seems really tedious, but I only plan to use it at the beginning of the year while we are still working on stamina.  On the chart I can mark off what station they have completed and see right away where they need to go.  Hopefully they will progess to doing this on their own and be accountable for going to all the stations.

As the students build stamina and are able to choose and move on to their next station on their own, I want them to be able to keep track of this.  I created this little slip of paper to take with them.  They can highlight the station they have completed and decide where they plan to go next. 


Along with the check-in page, students will have to view the classroom Daily 5 poster and  move their clip to the station they would like to go to.  Only a certain number of clips are allowed at each station.  Hopefully this will stop students from all running and hording at the same station! (Maybe.)  I ran literacy stations this same way in my classroom for a long time and it always worked for me.
I created these signs for the Daily 5 stations(a picture of only one is shown, you can see all of them when you download it).  Students will be allowed to put their clip on a dot.  When the dots are full, the station is full.


I have a Promethean board in my classroom and I often use it as a station for word work...but just in case I don't use it for a station this year, I created a flipchart where the students can keep track of the station they are going to and what they have left to complete.  This may be helpful right away at the beginning of the year while building stamina. 


I also LOVE this idea that can be created on the Promethean board.  I may create this flipchart instead...during all my free time. :)


I hope these ideas and resources help you out if you are planning to use the Daily 5 this year!  We'll see how it goes! :)